Been a long while since my last post… and I’m coming back with not a cooking post, but a travel post. Because during the COVID pandemic, my husband and I had a baby – who crazy enough, is already a toddler. Traveling with a baby or toddler is not easy. But it’s always worth it to see the world in their eyes.
There are a few things that make our lives easier when on the go, like blackout curtains or tent, travel crib, and travel sound machine. Sharing some of our favorites (Note: all are affiliate links) below; I also share how to use your WiFi-based camera such as a Nanit while traveling – even in hotels!
Our favorite baby/toddler travel items:
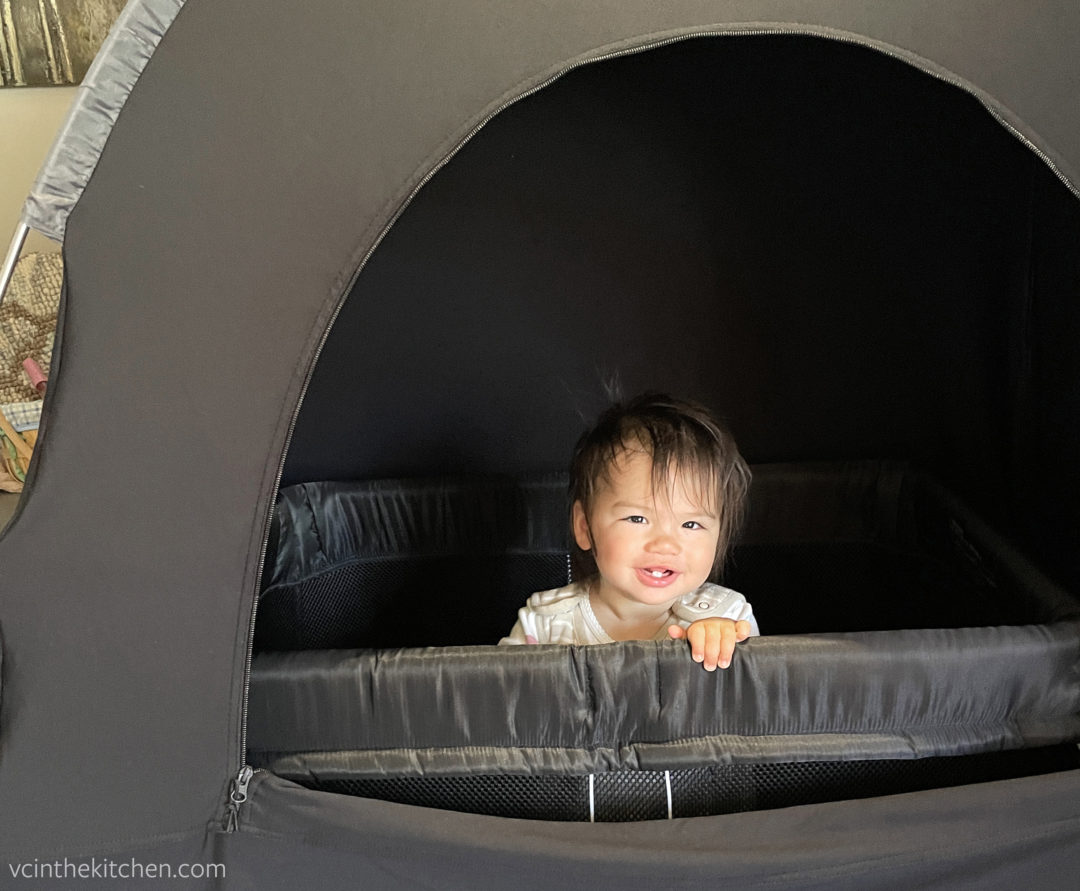
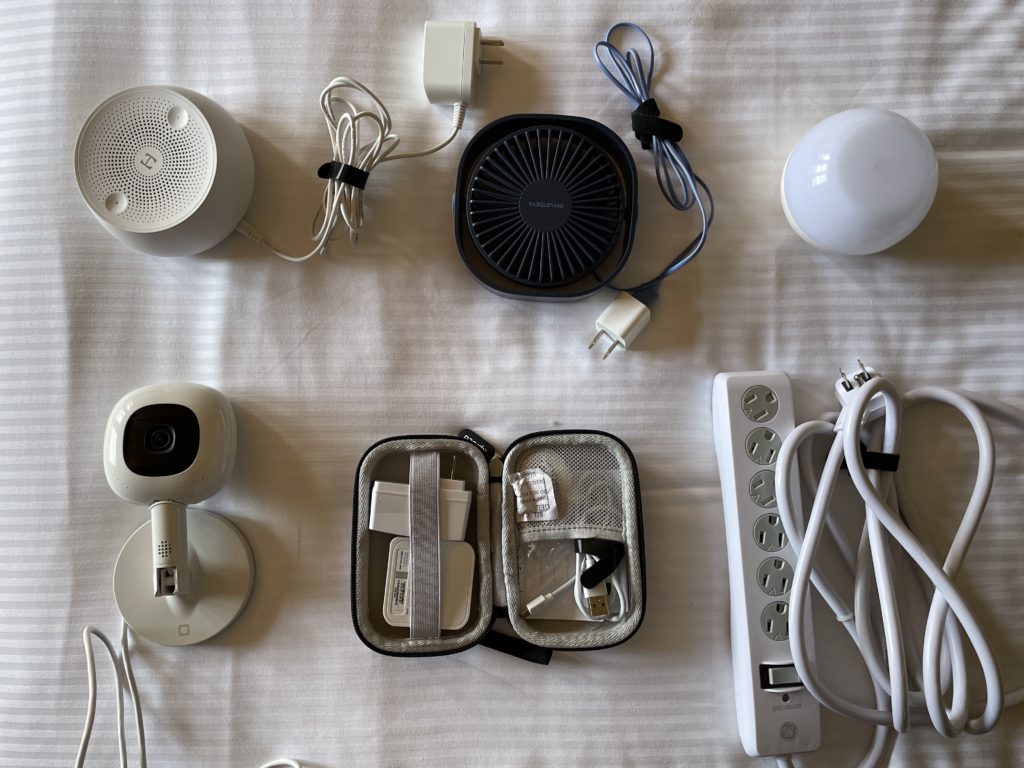
- Slumperpod – The absolute best blackout tent that goes over almost all travel cribs or playpens. Essential for us if sharing a room with a baby since you don’t have to go hide in the bathroom or stumble around in the dark! We bought a separate small USB fan to be used since the Slumberpod brand was out of stock at the time, and it fit perfectly in the fan pouch.
- BabyBjorn Travel Crib – This and the Guava Lotus are probably the most popular options around. We chose this since we’ve loved our other BabyBjorn gear and read that the crib mattress is slightly thicker than the Lotus. Although I know some parents prefer the Lotus due to the side door. Regardless, we love this crib and our daughter has slept multiple times in it comfortably.
- Hatch Mini Sound Machine – We use the Hatch Rest home and love the different white noise sounds and customization. While we have the Yogasleep Hushh portable white noise machine for the car, since it’s different than what we use at home, we find that our daughter doesn’t sleep as well with it. So instead, we love the Hatch Mini that allows us to use the same rain white noise that we use at home for her to get a good night’s rest while traveling. The only downside is that it needs to be plugged in while using, like the full-size Hatch.
- Travel nightlight – Especially when our daughter was younger, it was helpful to have this dimmable touch nightlight for middle of the night feeding sessions, diaper changes, or anything in between. We still travel with this light and sometimes use it as a nightlight for the hotel bathrooms if needed.
- Extension cord/power strip – This has been such a lifesaver in hotel rooms where there are limited outlets in weird places. We’ve used this power strip multiple times to plug in our Slumberpod fan, Hatch Mini and Nanit camera without any issue.
We also travel with our Nanit Pro camera and a travel router so we can always keep an eye on our daughter when traveling – even in hotels. Read more about how to set these up in hotels or on public WiFi networks below:
Using a WiFi camera such as the Nanit while traveling
And of course, parents want to keep an eye on their littles when traveling. A baby monitor/camera is key for us so we can keep an eye on her in the Slumberpod or head to the pool while our daughter napped. Many parents use a standard baby camera with a video monitor that can only be used within ~1000 feet or so which works for them.
But we use and love a Nanit Pro camera (affliliate link) at home, so I always bring it with us on trips. But the Nanit – and other WiFi based cameras like Wyze and Nest – don’t work on public WiFi networks that aren’t password protected like what many hotels have. I tried buying a backup baby monitor for a trip, but thought the quality was far inferior to the Nanit with a limited view, being tied to a separate monitor, and not being able to check in if we have a sitter. So instead, I tried to find a solution on how to use my Nanit while traveling in a hotel, and didn’t find a lot of answers around the Internet. But thankfully found a way to use my Nanit when on the go – especially in a hotel:
What you need:
- A travel router (I used this TP-Link travel router, but you can use this GL.iNet one instead)
- WiFi based camera like a Nanit or Wyze
- Nanit multi-stand (if using a Nanit camera)
How to connect your WiFi camera on a public hotel network:
What you have to do is to connect the travel router to the public wireless network using the Hotspot/WISP mode – this essentially turns the router into a hotspot with a password-protected WiFi network. I generally connect everything using my mobile device, but I’ve used my tablet before without issue with the following instructions on WiFi.
Hot tip: Connect your travel router first to the hotel WiFi before any other device in case the hotel has any limits to how many devices can be connected to the WiFi from your room at a time. You can connect multiple devices to the travel router (but which will only count as 1 device as far as the hotel knows!)
Set up instructions
- Plug in your travel router: Most, like this TP-Link router, will need to be plugged in to operate, usually via USB.
- Connect to the travel router: On your cell phone/tablet/laptop, pull up available wireless networks. Select the name of the router network, which can usually be found listed on the back of the travel router itself. You’ll likely be asked to enter a password, which should be provided with the router instructions. You’ll be able to change the router network and password at a later point.
- Connect the router in WISP/Hotspot mode: Log in to your router and follow the instructions to connect to the public hotel network in Hotspot/WISP (Wireless Internet Service Provider) mode. For instance, using this TP-Link router, you’ll be able to do the following:
- Using a web browser on your device, visit http://tplinkwifi.net and follow the Quick Setup Wizard instructions, selecting WISP/Hotspot Router Mode.
- Select the WAN Connection Type. When using the router with a hotel network, select Dynamic IP.
- Select the public hotel network from the list of available wireless networks (if there are multiple, choose the one with the highest signal strength at the top of the list), click Connect
- Go to the router’s status page to check if you’ve successfully connected to the hotel network.
- Note: For some hotels, you may need to open up a new browser and login the hotel WiFi network (for instance, using your last name and/or room number) to actually connect to the Internet.
- Plug in your WiFi-based camera: Plug in and set up your camera. If you’re using a Nanit camera, it will only work when traveling if you have a Nanit multi-stand (sold separately).
- Connect your camera to the wifi: You’ll have to pair your camera to the new travel router WiFi network.
- If using the Nanit, you can do so via the Nanit app by clicking [Baby’s] Settings via the top left navigation menu, then scrolling down to Network > “Pair Nanit with our network”. Follow the instructions on how to pair your Nanit to the network – which will involve you pressing the small WiFi button on the back of the camera until the light flashes, selecting your travel router network, and making sure the Nanit is connected.
Once you connect your Nanit/camera to the travel router WiFi network, you should be set to go! Double check to ensure you can see the video of your crib clearly, but you should be able to use your Nanit when traveling now. As another bonus, since some hotels cap how many devices can connect to the Internet per room, using a travel router allows you to connect multiple devices to the hotel WiFi network without any restrictions!
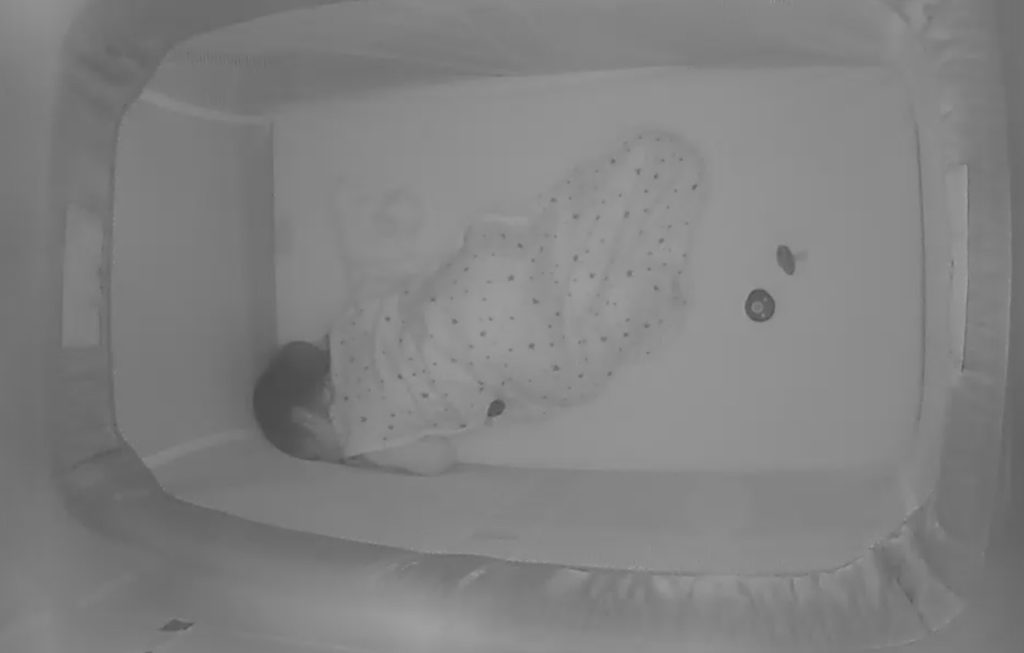
One note: If you’re using the Nanit camera with a Slumberpod, they advise you to install the camera sideways in the camera pouch. I found it best for the multistand bottom to be on the left, so the cord comes out at the end closest to where the zipper is. Press the plastic up against the camera face for the best picture quality. It may take a bit of maneuvering, but I’ve found the picture quality on the Nanit to be quite good while traveling. Sharing a photo of what the picture quality is like taken from my Nanit app, with the camera in the Slumberpod while on a hotel network.
Hope this helps you have additional peace of mind while traveling with your kid(s). Happy travels!